Documentation
Basic Guide: How to Use Elementor and WordPress
Welcome! This guide is designed to help you understand the basics of how to make changes to your site using WordPress e Elementor. With it, you can make small changes without the need for technical help. Let's go!
1. introduction to WordPress
- What is WordPressWordPress is the platform on which your website is built. It is like a “manager” that allows you to create and edit the content of your site quickly and easily.
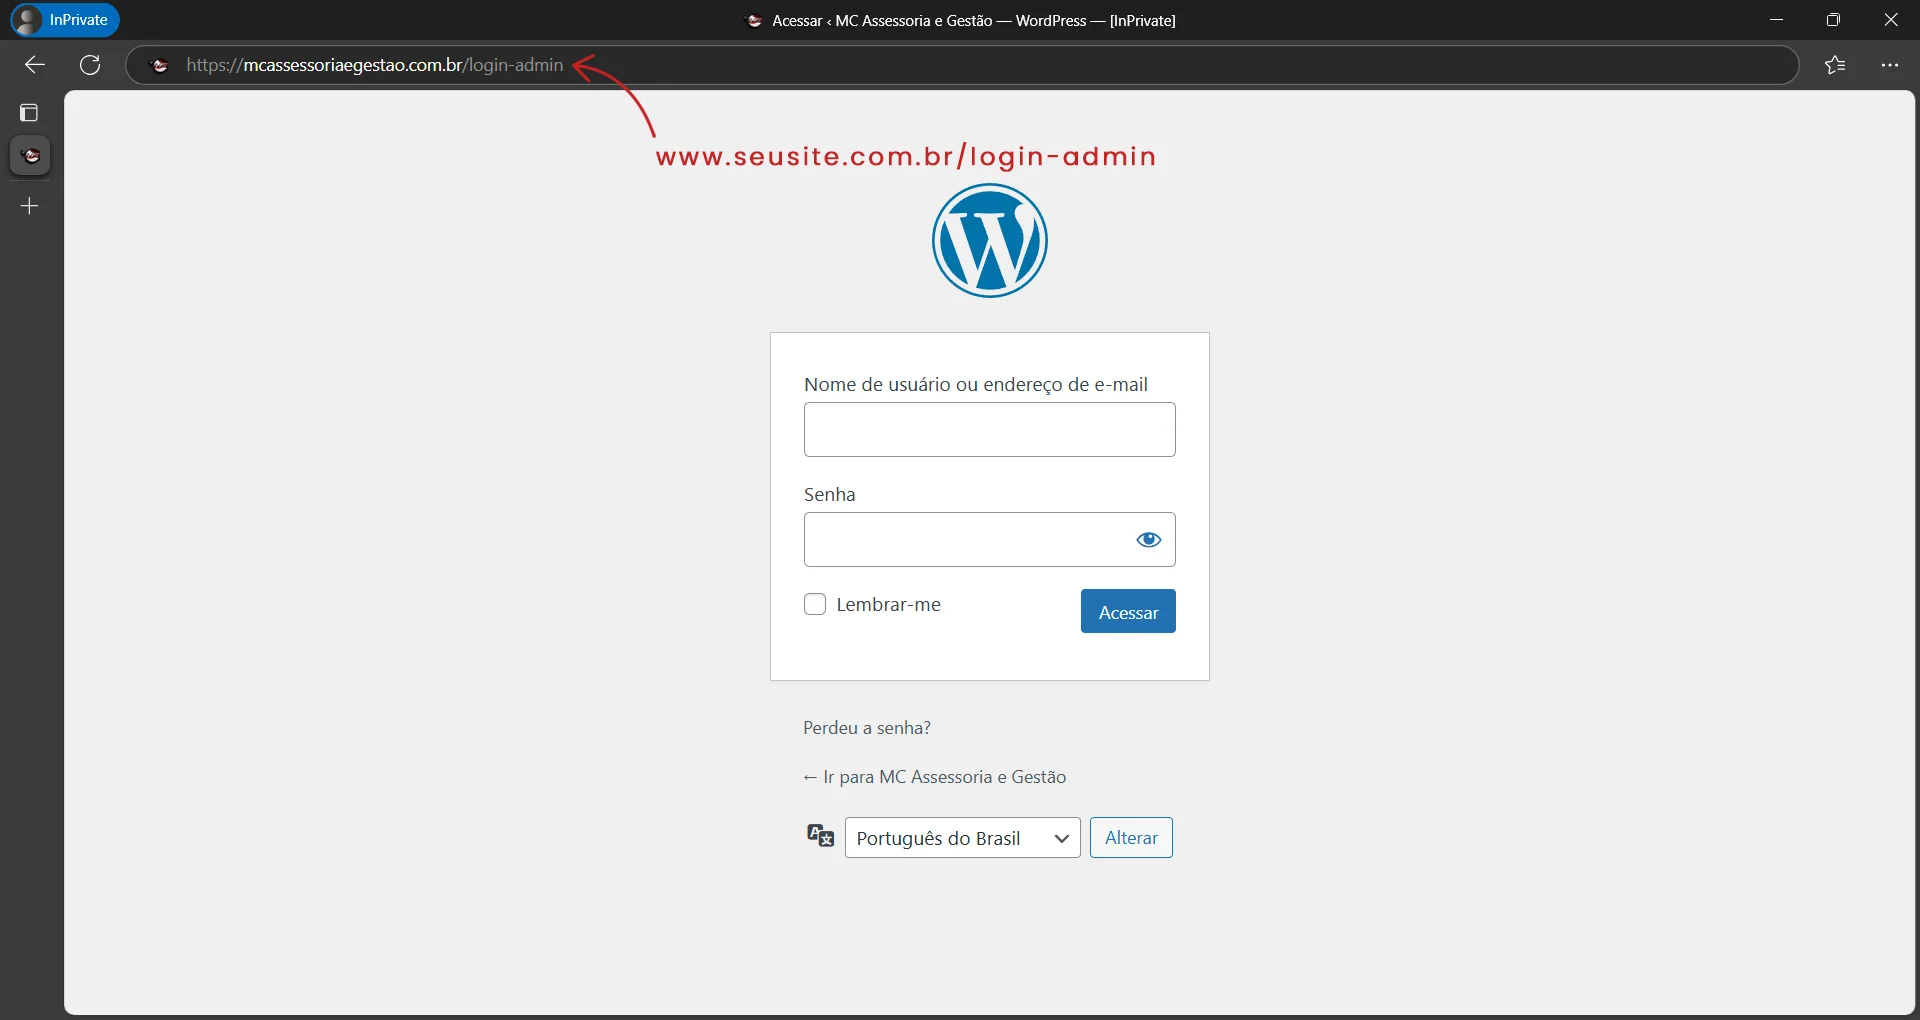
- How to access the control panelTo access the panel where you can make changes, simply add /login-admin to the end of your website address (example: www.seusite.com.br/login-admin). Then just enter your username and password.
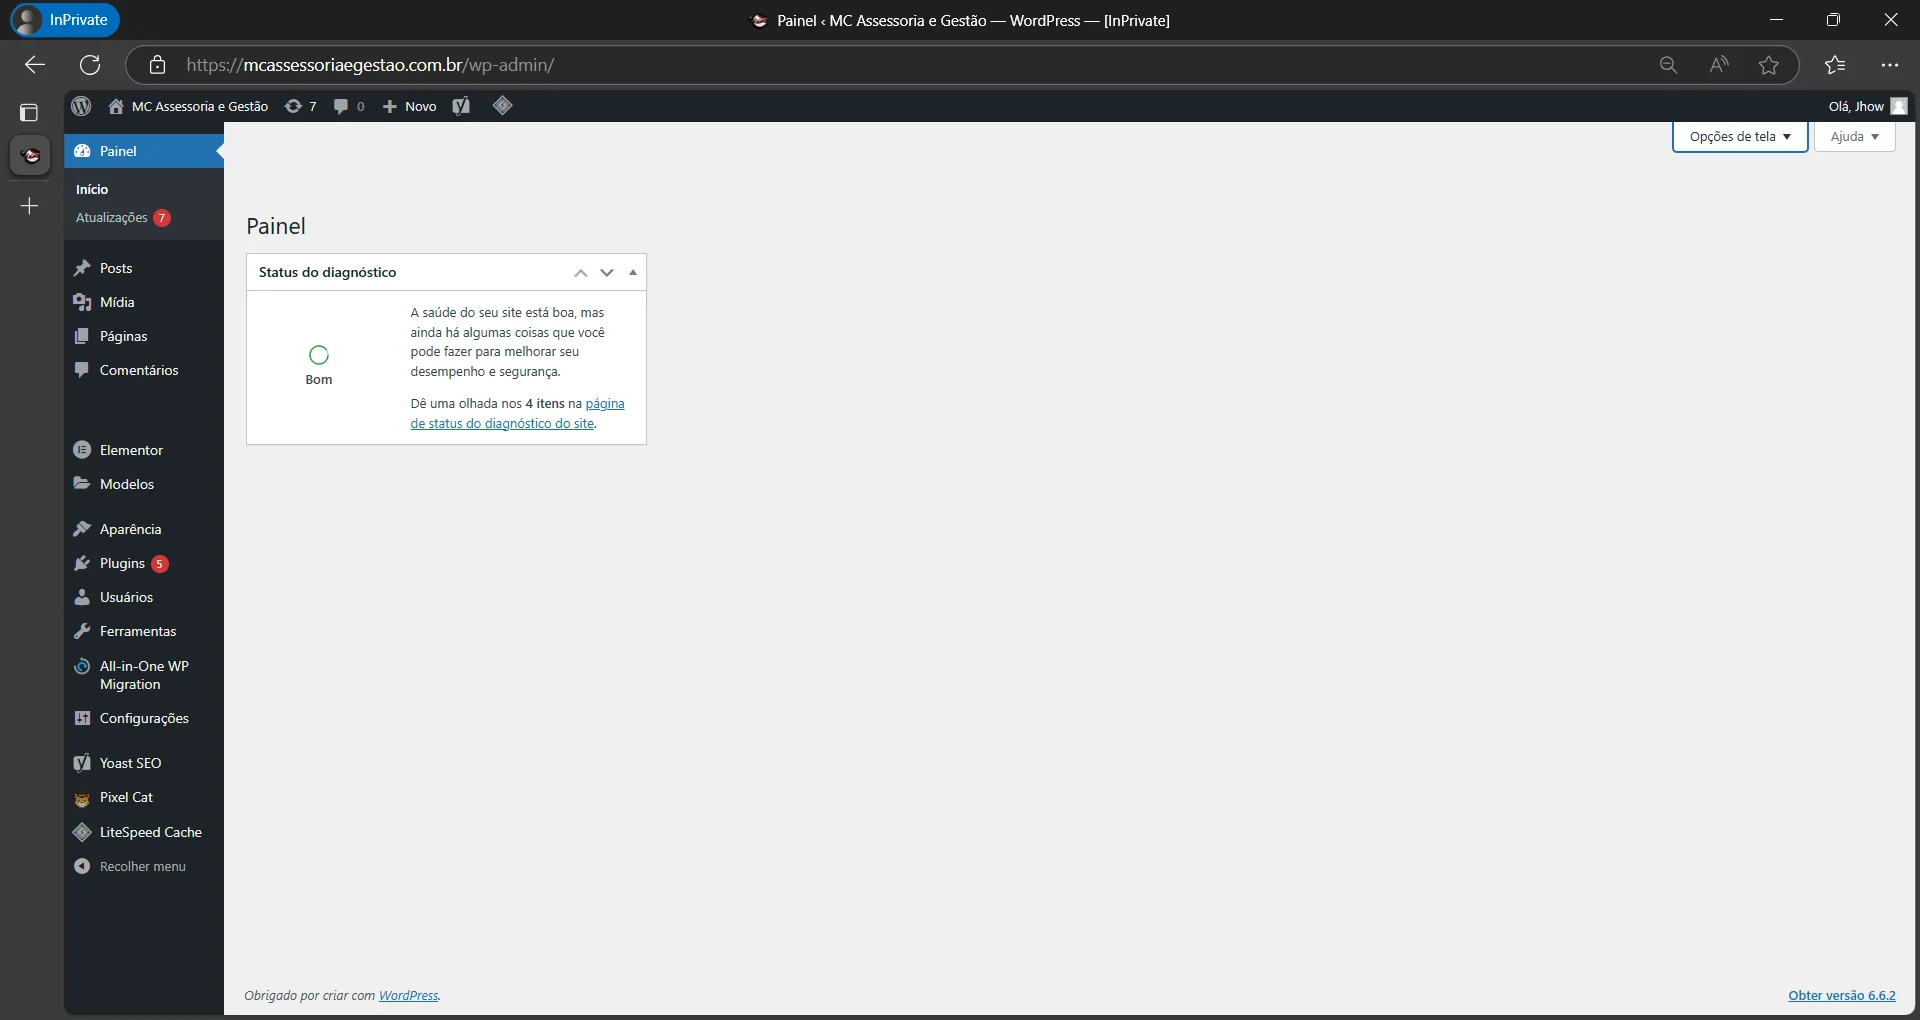
2. Exploring the WordPress Dashboard
Now that you're in the control panel, here are the main items you'll be using:
Panel: This is where you see a quick summary of the site, such as statistics available updates and WordPress news.
Pages
The Pages allows you to create, edit and view all the pages on your site. Here's what you can do:
How to access the pages:
To access the pages, go to the left-hand side menu in the WordPress dashboard and click on Pages.
There you will see a list of all the pages that already exist on your site.
How to edit an existing page:
1. When you find the page you want to change, hover over its title.
2. When you do this, some options will appear below the page title, such as “Edit“, “Editing with Elementor“, “Recycle Bin”, among others.
3. To make edits using Elementor, click on Editing with Elementor. This will open the visual editor, where you can make changes by dragging and dropping elements directly onto the page.

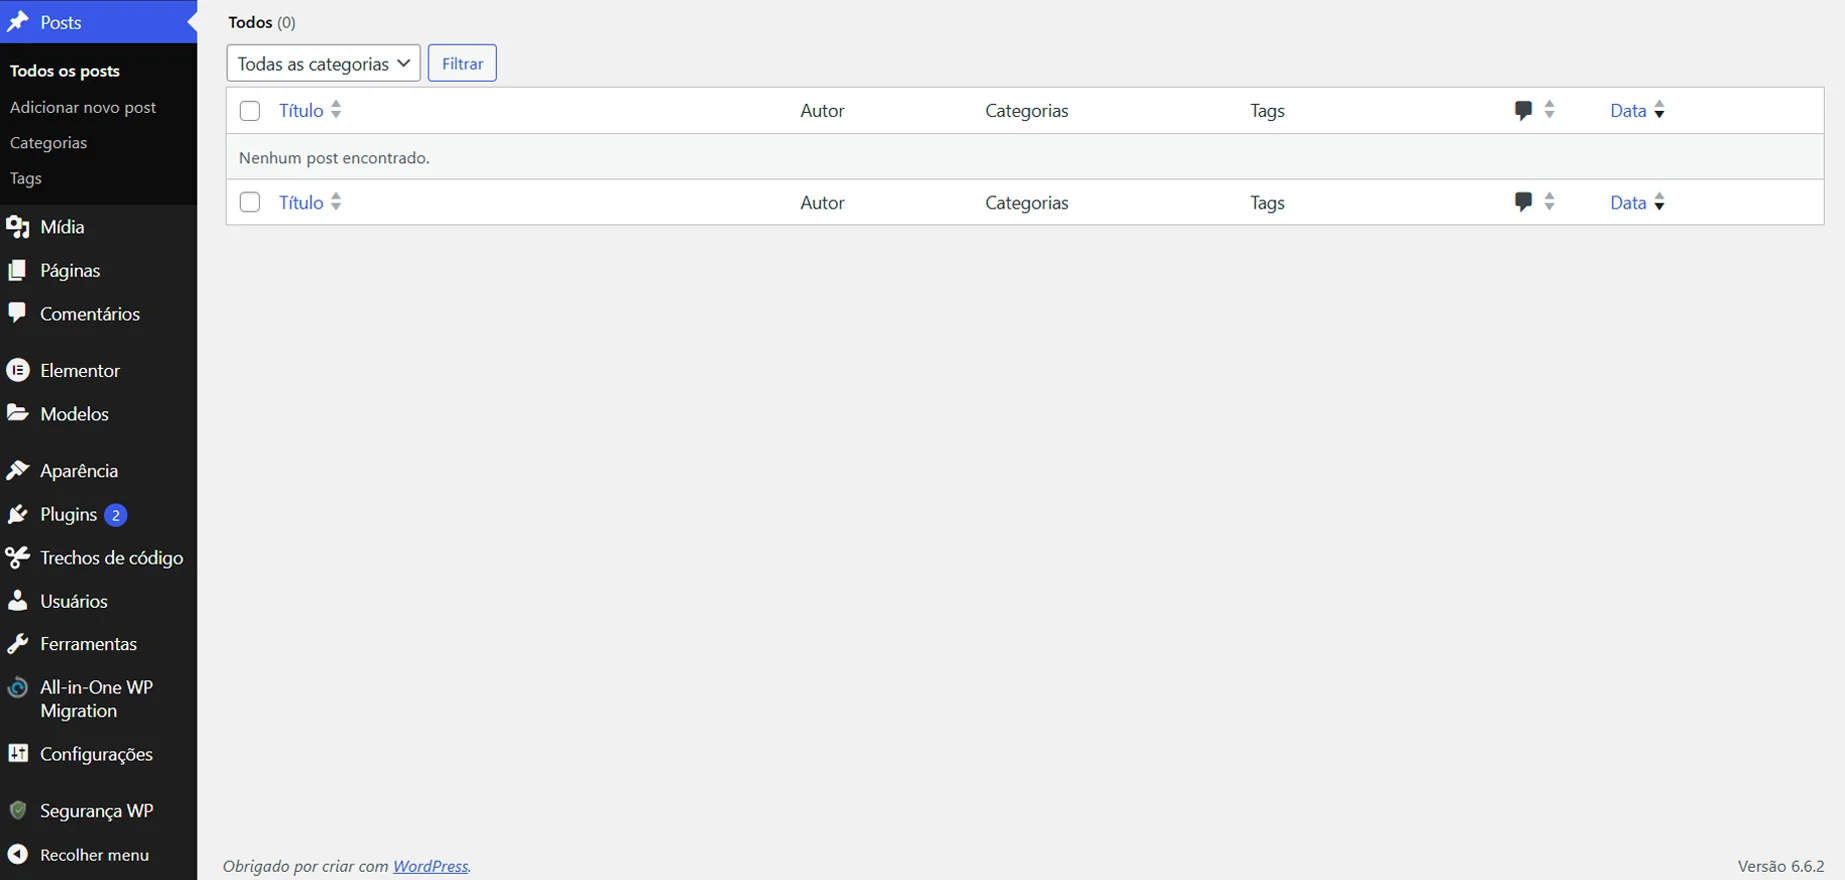
Posts
If your site has a blog, this is where you create and manage your posts. It works in a similar way to pages.
Media
All the media content (images, videos, documents) on your site is here. If you want to add or remove an image, this is the right place.

Appearance
In the Appearance, You can change the theme of your site and customize the overall layout. Here, you can:
1. Choose a new theme to change the look of your site.
2. Customize theme elements such as colors, fonts and logo.
3. Access the widget and menu editor.
We use the theme Hello Elementor because it is a lightweight theme and 100% compatible with Elementor, guaranteeing the best performance and flexibility for your site.
Attention: Changing the theme or modifying important parts in this section can affect the layout of your site and break the design. I recommend that you don't make any changes here without consulting an expert or making a complete backup of the site.

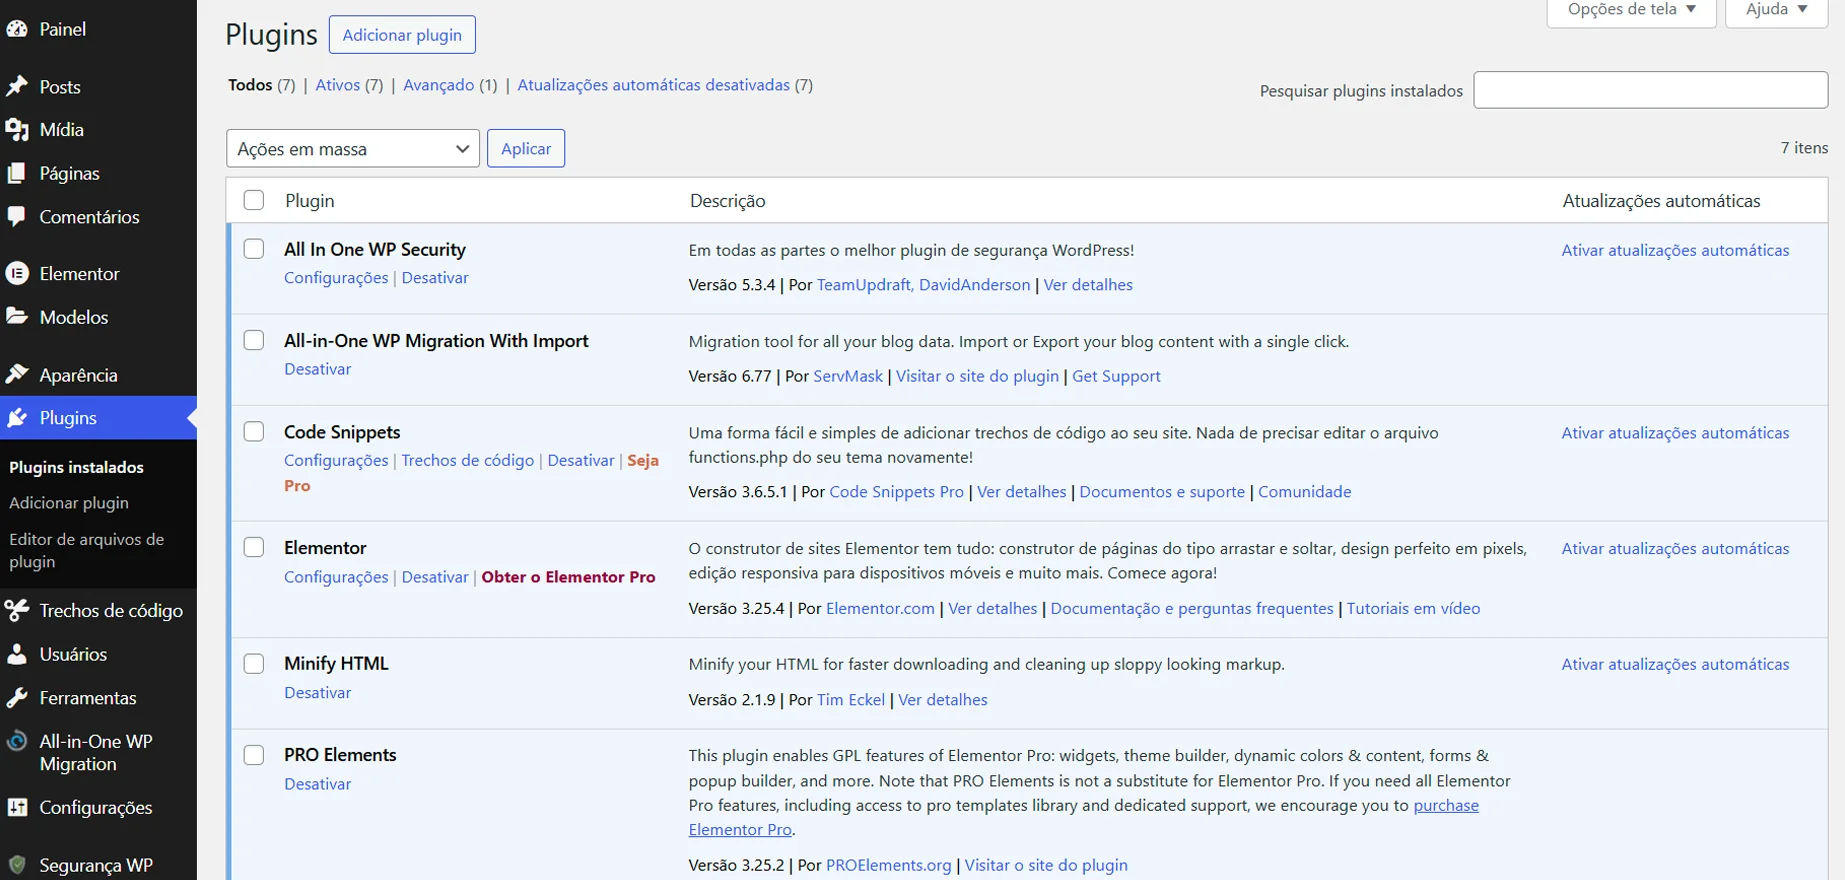
Plugins
Plugins are tools that add functionality to your site (e.g. contact forms, integration with social networks). Here, you can add, activate or deactivate plugins.
Users
In the Users, You can manage all the access accounts to your site. This includes:
Add new users: If you need to add new administrators, editors or other types of users, this is where you can do it.
Change passwords: We have generated a default username and password for you, which was given to you when the site was delivered. If you wish to change your password for security or other reasons, you can do so here.
To change your password:
Go to Users > Your profile.
Scroll down to the section Generate new password.
Click on Generate new password, enter your new password and then click on Update profile to save the change.

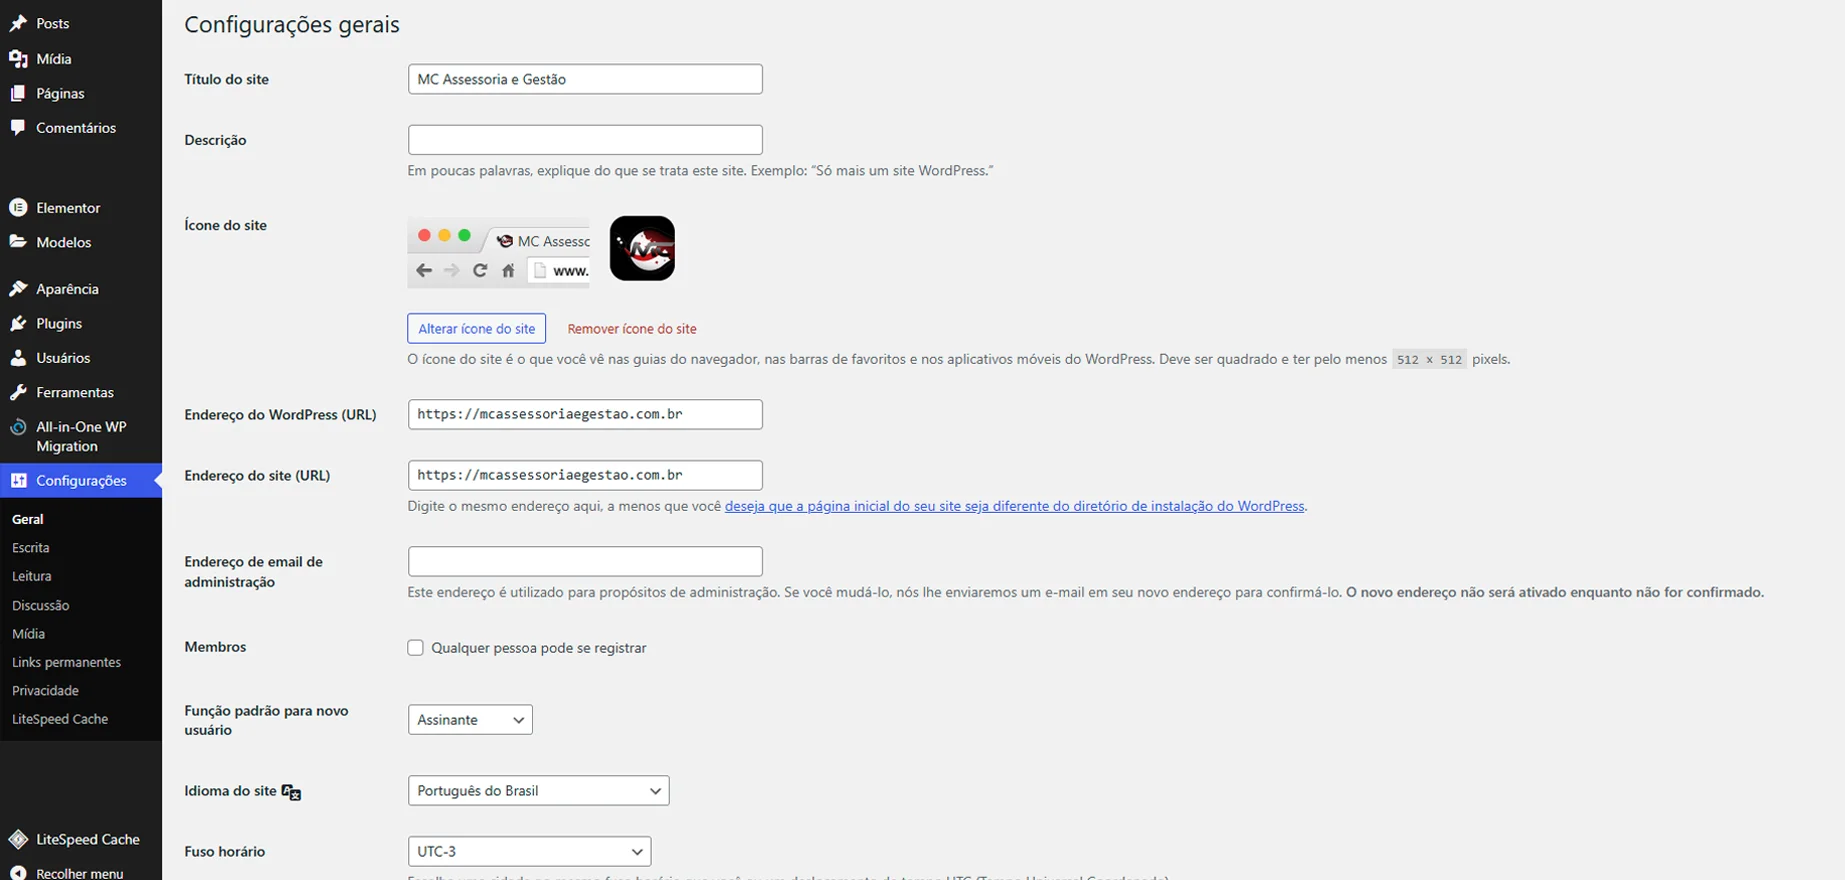
Settings
The section Settings allows you to adjust general details of the site, such as the title, URL, and language. However, you will rarely need to make any changes here, as these settings have already been made by us and are properly configured for the smooth running of the site.
If, for any reason, specific adjustments need to be made, it is advisable to consult a specialist to ensure that nothing essential is changed, avoiding possible problems on the site.
3. How to use Elementor
What is Elementor: Elementor is a visual editing tool used in WordPress. It allows you to create and customize pages on your site intuitively by dragging and dropping elements. With Elementor, you can edit the design of your pages without needing advanced programming skills, making the creation process quick and easy.
Accessing the WordPress Dashboard
Go to Pages in the left panel menu.
Hover over the page you want to edit and click on Editing with Elementor.
We will use the Home Page as an example, because I'm going to show these steps with images to make them easier to understand.
Using the Elementor Interface
When Elementor opens, you'll see your page with a sidebar on the left containing widgets. Here's how to use it:
Containers: Containers are large areas of the page. They can contain several columns and widgets. You only need to add a new container if you want to create a new section or add extra content to the page. To add a container, click on the “+” button at the top of the page.
Widgets: Widgets are the elements you can add to your page, such as text, images, buttons, videos, etc. To add a widget, simply drag the widget from the sidebar and drop it onto the page.
Saving and Publishing: Whenever you make changes, remember to click on the button Update in the bottom left corner of the screen to save your changes.

Changing images in Elementor
Step by step:
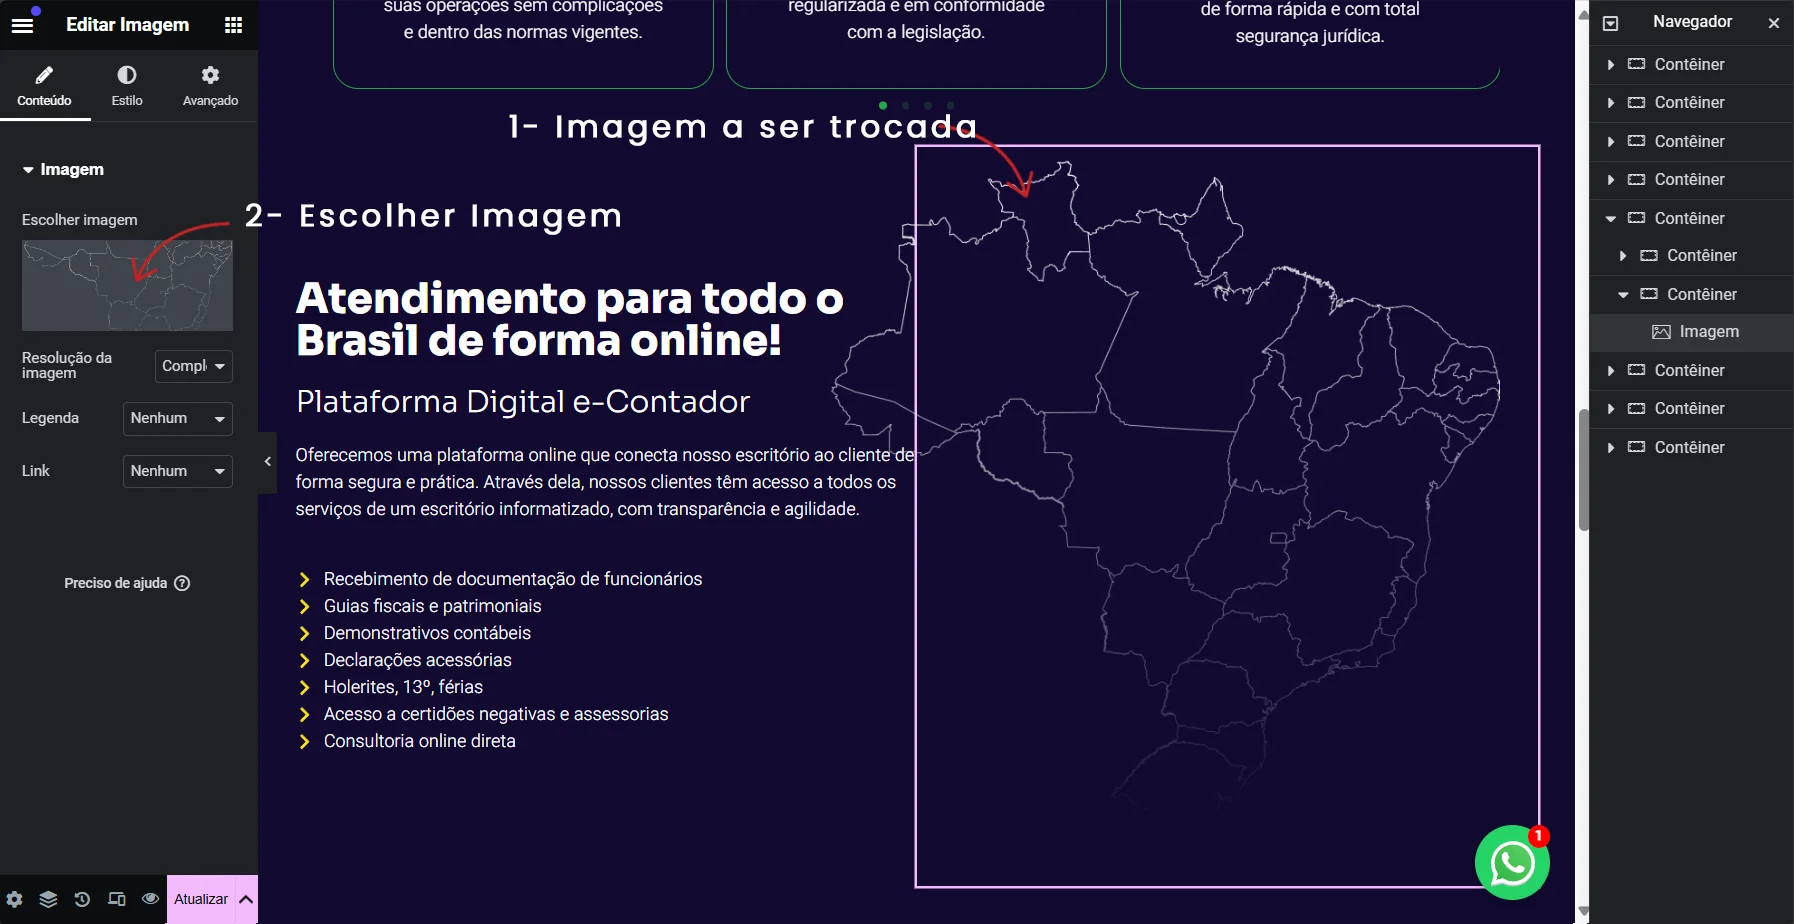
1. Select the image to be changed: Click on the image you want to replace directly in the page view.
2. Choose Image: In the sidebar on the left, you will see the option Choose Image (as shown in the example image). Click on it to open the media library.
3. Send File: If you want to upload a new image, click on Send files. Otherwise, click Media library to choose an image that is already available on the site.
4. Select Computer File: If you have chosen “Send files”, click on Select files and choose the image from your computer.
5. Finalize the selection: After choosing the image you want, click on the button Select to apply it to the page.
6. Save changes: Remember to click on the Update in the bottom left-hand corner to save your changes.

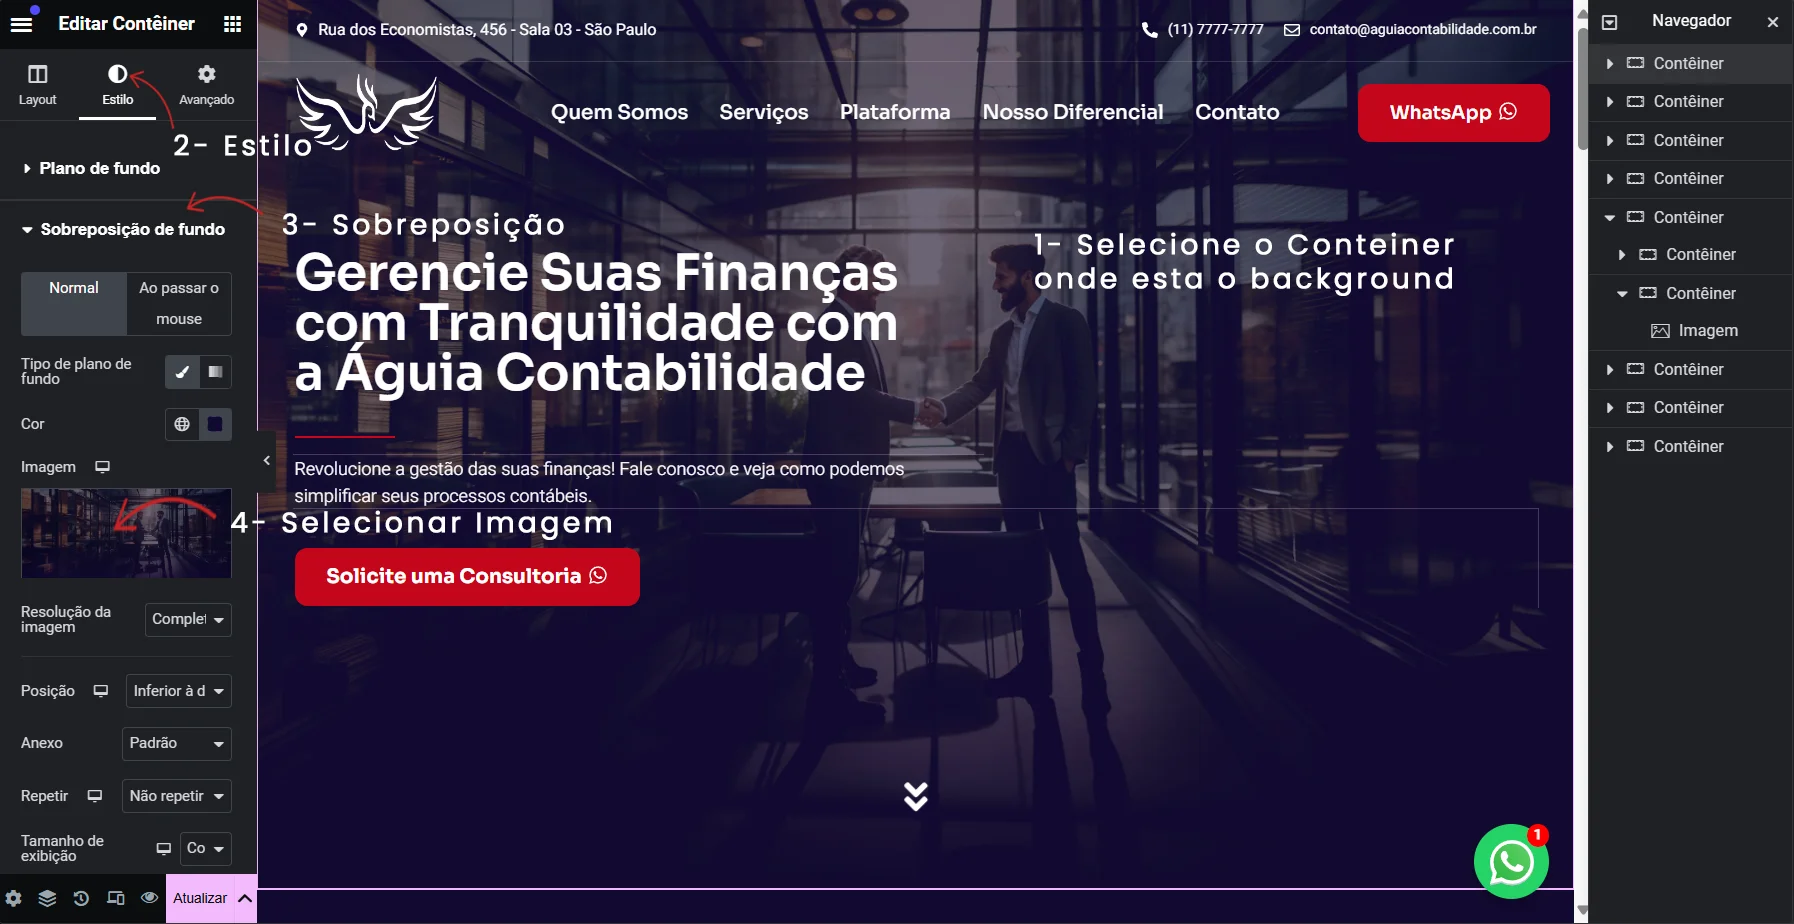
Changing the Background of a Container in Elementor
In Elementor, the background is usually an image that visually completes the container, serving as a background image. This type of image helps to give style and context to the site's content.
Step by step:
1. Select the Container: Click on the container where you want to change the background. This container usually covers a large area of the page and contains other content elements.
2. Go to the Style tab: In the sidebar on the left, click on the tab Style to see the background options.
3. Configure the background: In the Background, go to Background overlay if you want to apply an overlay, or directly on Image to replace the container's background image.
4. Select Image: Click on the area where Image. This will open the media library, where you can choose a new background image. Media selection works in the same way as image swapping: you can select an existing image or upload a new one.
5. Adjust Display Settings: After selecting the image, adjust the settings as follows Position, Size e Repetition to achieve the desired visual effect.
6. Save changes: Remember to click on the Update in the bottom left-hand corner to save your changes.
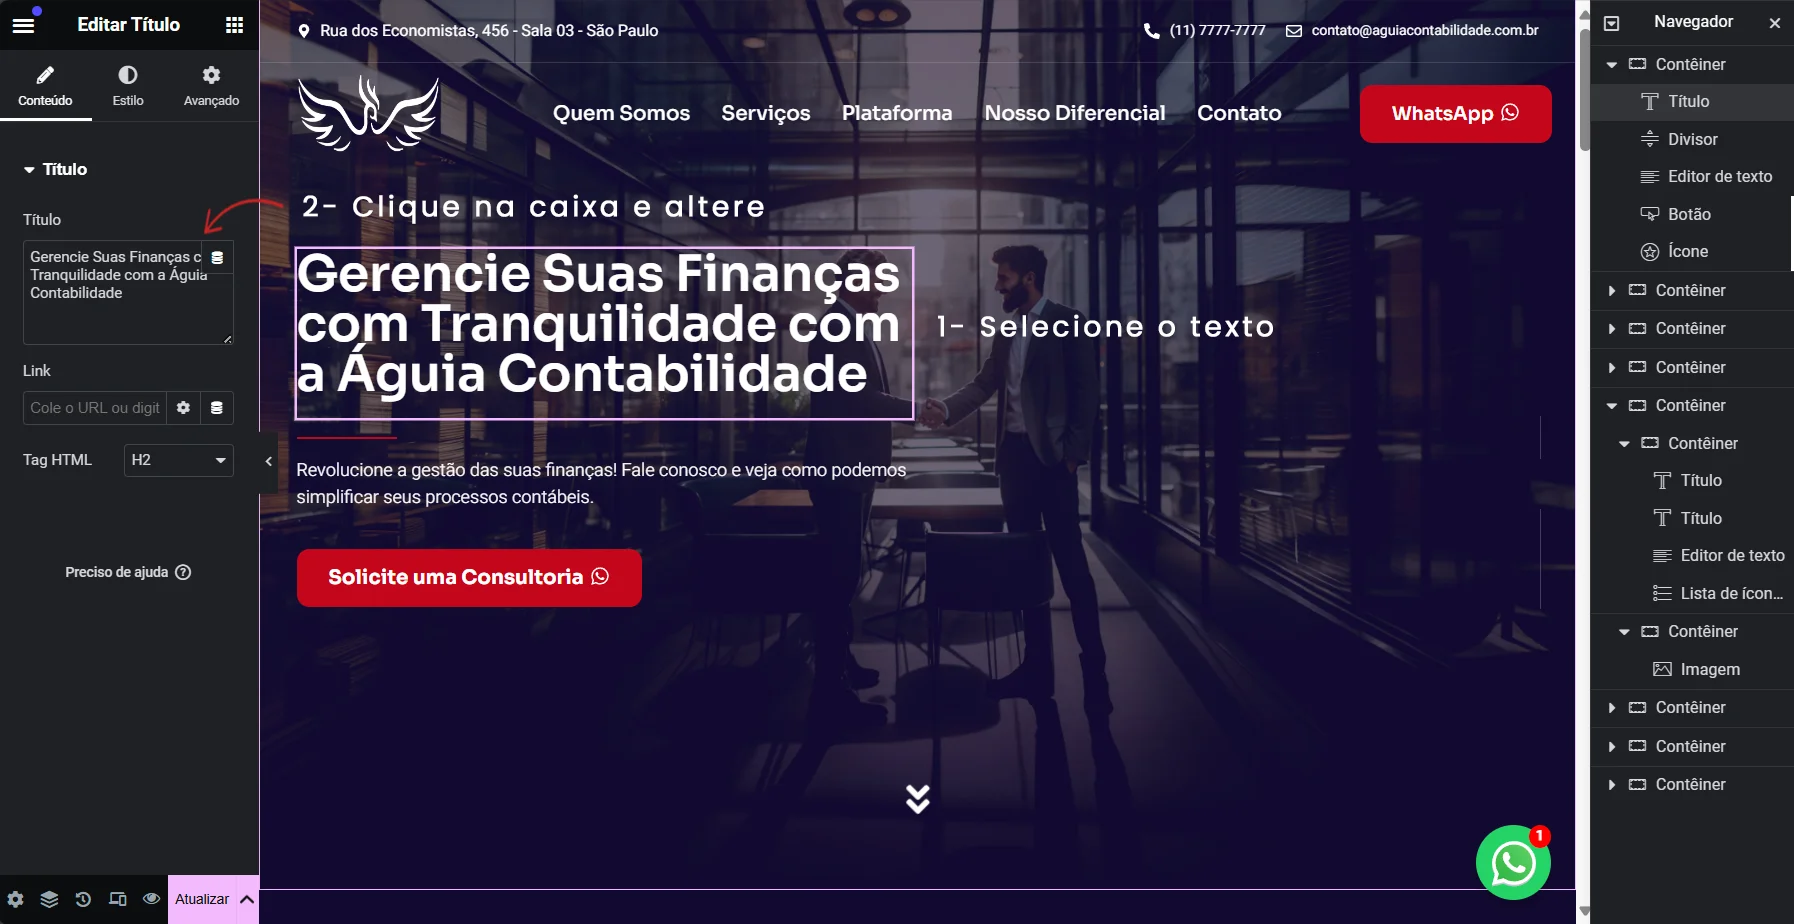
Editing Text in Elementor
In Elementor, you can easily change any text on the page. Below is a step-by-step guide to editing a specific text.
Step by step:
1. Select the Text: Click on the text you want to edit directly on the page. In the example image, the selected text is “Manage your finances with peace of mind with Águia Contabilidade”.
2. Edit in the Sidebar: After selecting the text, the sidebar on the left will show the editing options for that title. In the text box entitled Title, You can modify the content as desired.
3. Configure the Text Style (optional): If you need to adjust the appearance of the text (such as font, color or size), go to the tab Style in the sidebar. However, as the site already follows a visual identity, this change is only necessary if you are adding new text or an element that needs to be stylized to match the rest of the site.
4. Save changes: After making the desired changes, click on the button Update in the bottom left-hand corner to save the changes made to the page.
Finalization
These instructions cover the basics of making simple changes to your site, such as changing images and text or adding new visual elements that don't compromise the site's structure.
For questions or more complex modifications, please contact our team of developers using the WhatsApp in the top right-hand corner of the page. We're ready to help you!
Simple changes, such as changing images and texts or adding images that do not alter the structure of the site, can be requested at no extra cost.
Thank you for using our guide and we hope you enjoy all the customization possibilities offered by Elementor!